Alright, I was looking for an easy way to add comments to my blog. I found 2 popular solutions: Disqus and Cusdis (the names look interestingly similar!).
On the one hand we have Disqus, a widely used comment system, but it’s not privacy-friendly and it’s not open-source. Bummer.
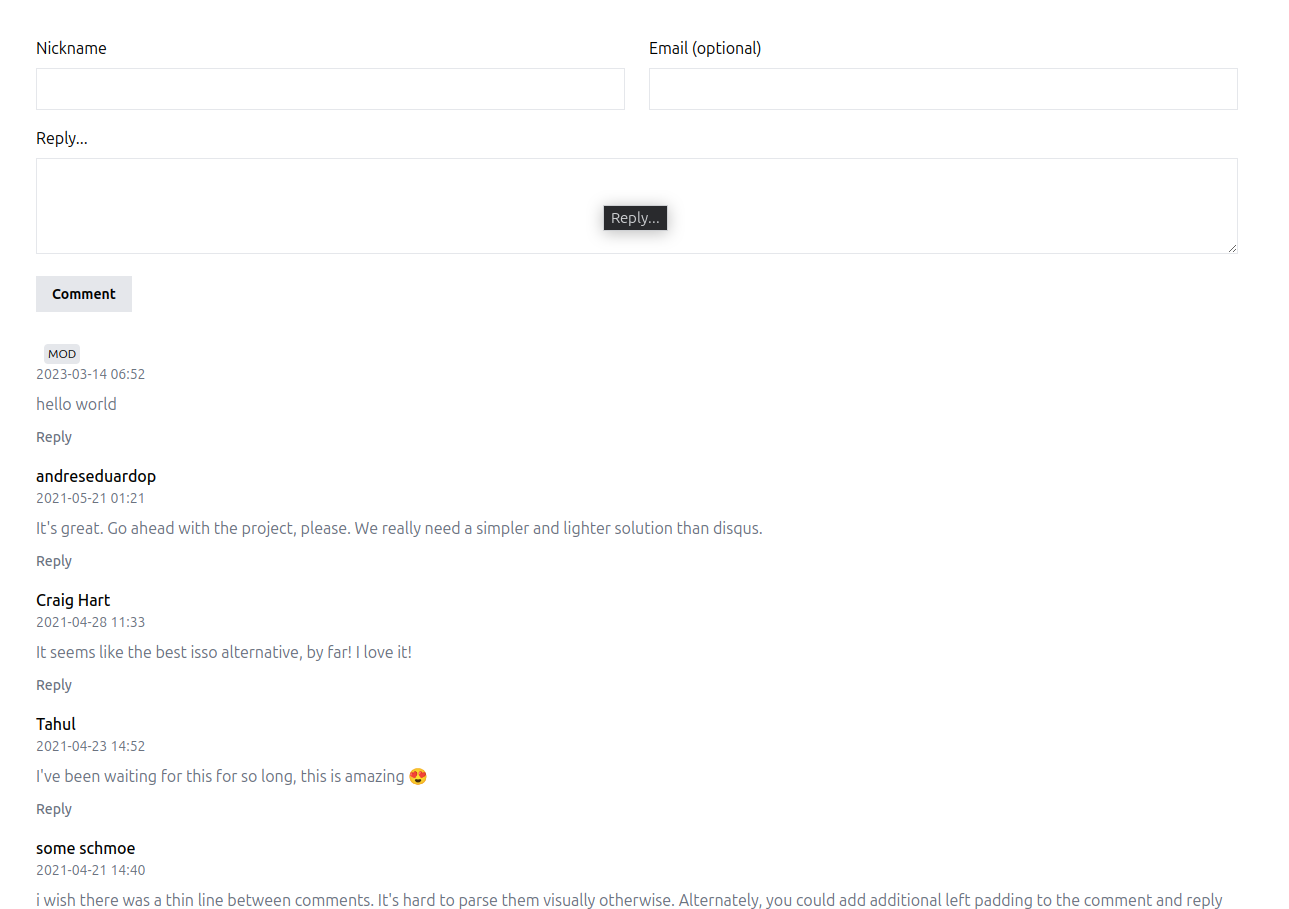
On the other hand, we have Cusdis, a privacy-friendly free and open-source comment system that has a lot of potential. Comments do not need an account to be posted, it is lightweight and it’s easy to use with hugo… at least in theory. You can even host it yourself if you want to!
In this article, I will show you how I modified my hugo theme to support Cusdis and how I customized it to fit my needs.
Step 1: Create a Cusdis account
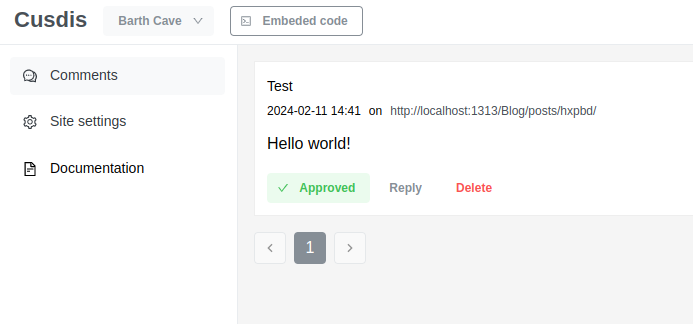
Well this one is quite straightforward, just go to cusdis.com and create an account. Once you’re done, you will be redirected to your dashboard. That’s where new comments will show up.
Now we want to get the code that we will need to embed Cusdis in our website. Once you have configured the website on Cusdis dashboard, we can get the embed code in the top left corner:
It will present itself as some html like this:
<div id="cusdis_thread"
  data-host="https://cusdis.com"
  data-app-id="{{ APP_ID }}"
  data-page-id="{{ PAGE_ID }}"
  data-page-url="{{ PAGE_URL }}"
  data-page-title="{{ PAGE_TITLE }}"
></div>
<script async defer src="https://cusdis.com/js/cusdis.es.js"></script>
Step 2: Make your theme Cusdis-friendly
We would like to directly use this code in our markdown files. Depending on whether you use Git or not for your hugo blog, the following steps may differ. If you don’t use Git, skip to the next section.
If you are using Git
This is a little bit more complex. Modifying the submodule of your theme will prevent you from committing your blog changes unless you commit the theme changes before. This is tricky because you won’t be able to directly commit your theme changes unless you own the theme repository.
What’s the solution then? Well we have to own the theme repo! To do that, go to the github page of your theme and fork it.
Now you should have a copy of the theme in your repositories.
To make your blog acknowledge the new theme, edit the .gitmodules file in the root of your blog. You should see something like this:
[submodule "themes/your-theme"]
	path = themes/your-theme
	url = the-url-of-the-theme
You simply have to replace the url with the url of your forked theme. (usually you only have to change the username part of the url).
Now open a new terminal and navigate to the root of your blog. Run the following commands:
git submodule sync --recursive
Congrats you are now using your forked theme! You can now modify it as you wish.
You can now follow the same steps as the non-git users to add the Cusdis embed code to your theme. Just don’t forget to commit your theme changes before you commit your blog changes.
If you are not using Git
When not using Git, you can directly modify your copy of your theme. Go in the folder of your theme, then layouts/_default and open single.html.
This file is the template for your posts. After the </article> closing tag, simply paste the embed code you got from Cusdis.
You will need to replace the {{ PAGE_ID }}, {{ PAGE_URL }} and {{ PAGE_TITLE }} with the appropriate values. In my case, I used the following:
<div id="cusdis_thread"
    data-host="https://cusdis.com"
    data-app-id="{{ APP_ID }}"
    data-page-id="{{ .Permalink }}"
    data-page-url="{{ .Permalink }}"
    data-page-title="{{ .Title }}"
    data-theme="auto"
></div>
<script async defer src="https://cusdis.com/js/cusdis.es.js"></script>
Notice how I also added data-theme="auto" to the div. This will make Cusdis automatically switch between light and dark mode depending on the user’s system settings. The documentation for these tags can be found at cusdis.com.
You can go further by adding a new entry in config.toml called cusdisID for example to store your {{ APP_ID }} with the other settings. You can then replace {{ APP_ID }} by {{ .Site.Params.cusdisID }} in your embed code.
Even better you can create a pull request to the theme repository to add this feature for everyone! (or just get ghosted by the maintainer)
You should see the comment section at the bottom of your posts now! Check the next section if you want to customize the look of Cusdis.
Step 3: Customize Cusdis
Beyond the light and dark theme, there is not much customization you can do for Cusdis because it is trapped in an iframe.
In order to add some style, we need to inject some css code into the iframe. We will add this javascript code just after our embed code:
<script>
const observer = new MutationObserver((mutations) => {
    mutations.forEach((mutation) => {
        if (mutation.addedNodes.length == 0) return;
        const iframe = mutation.addedNodes[0];
        if (iframe.tagName !== 'IFRAME') return;

        const additionalStyles = `
        .dark {
            background: black;
        }
        `;

        iframe.srcdoc = iframe.srcdoc.replace('</style>', additionalStyles + '</style>');
    });
});
observer.observe(document.getElementById("cusdis_thread"), { childList: true, subtree: true });
</script>
Basically, this code will listen for the iframe creation and inject some css code into it. In this example, I added a rule to make the background black when the dark theme is enabled.
You can add any css rule you want! Change the font-family, size, spacing! The only bottleneck is your css knowhow. If you don’t know how to query the elements inside the iframe, you can use the browser’s dev tools to inspect the iframe and find the classes and ids you need.
While this solution is hacky, it works well for me and might as well for you! Let me know if you find a cleaner way to do this.